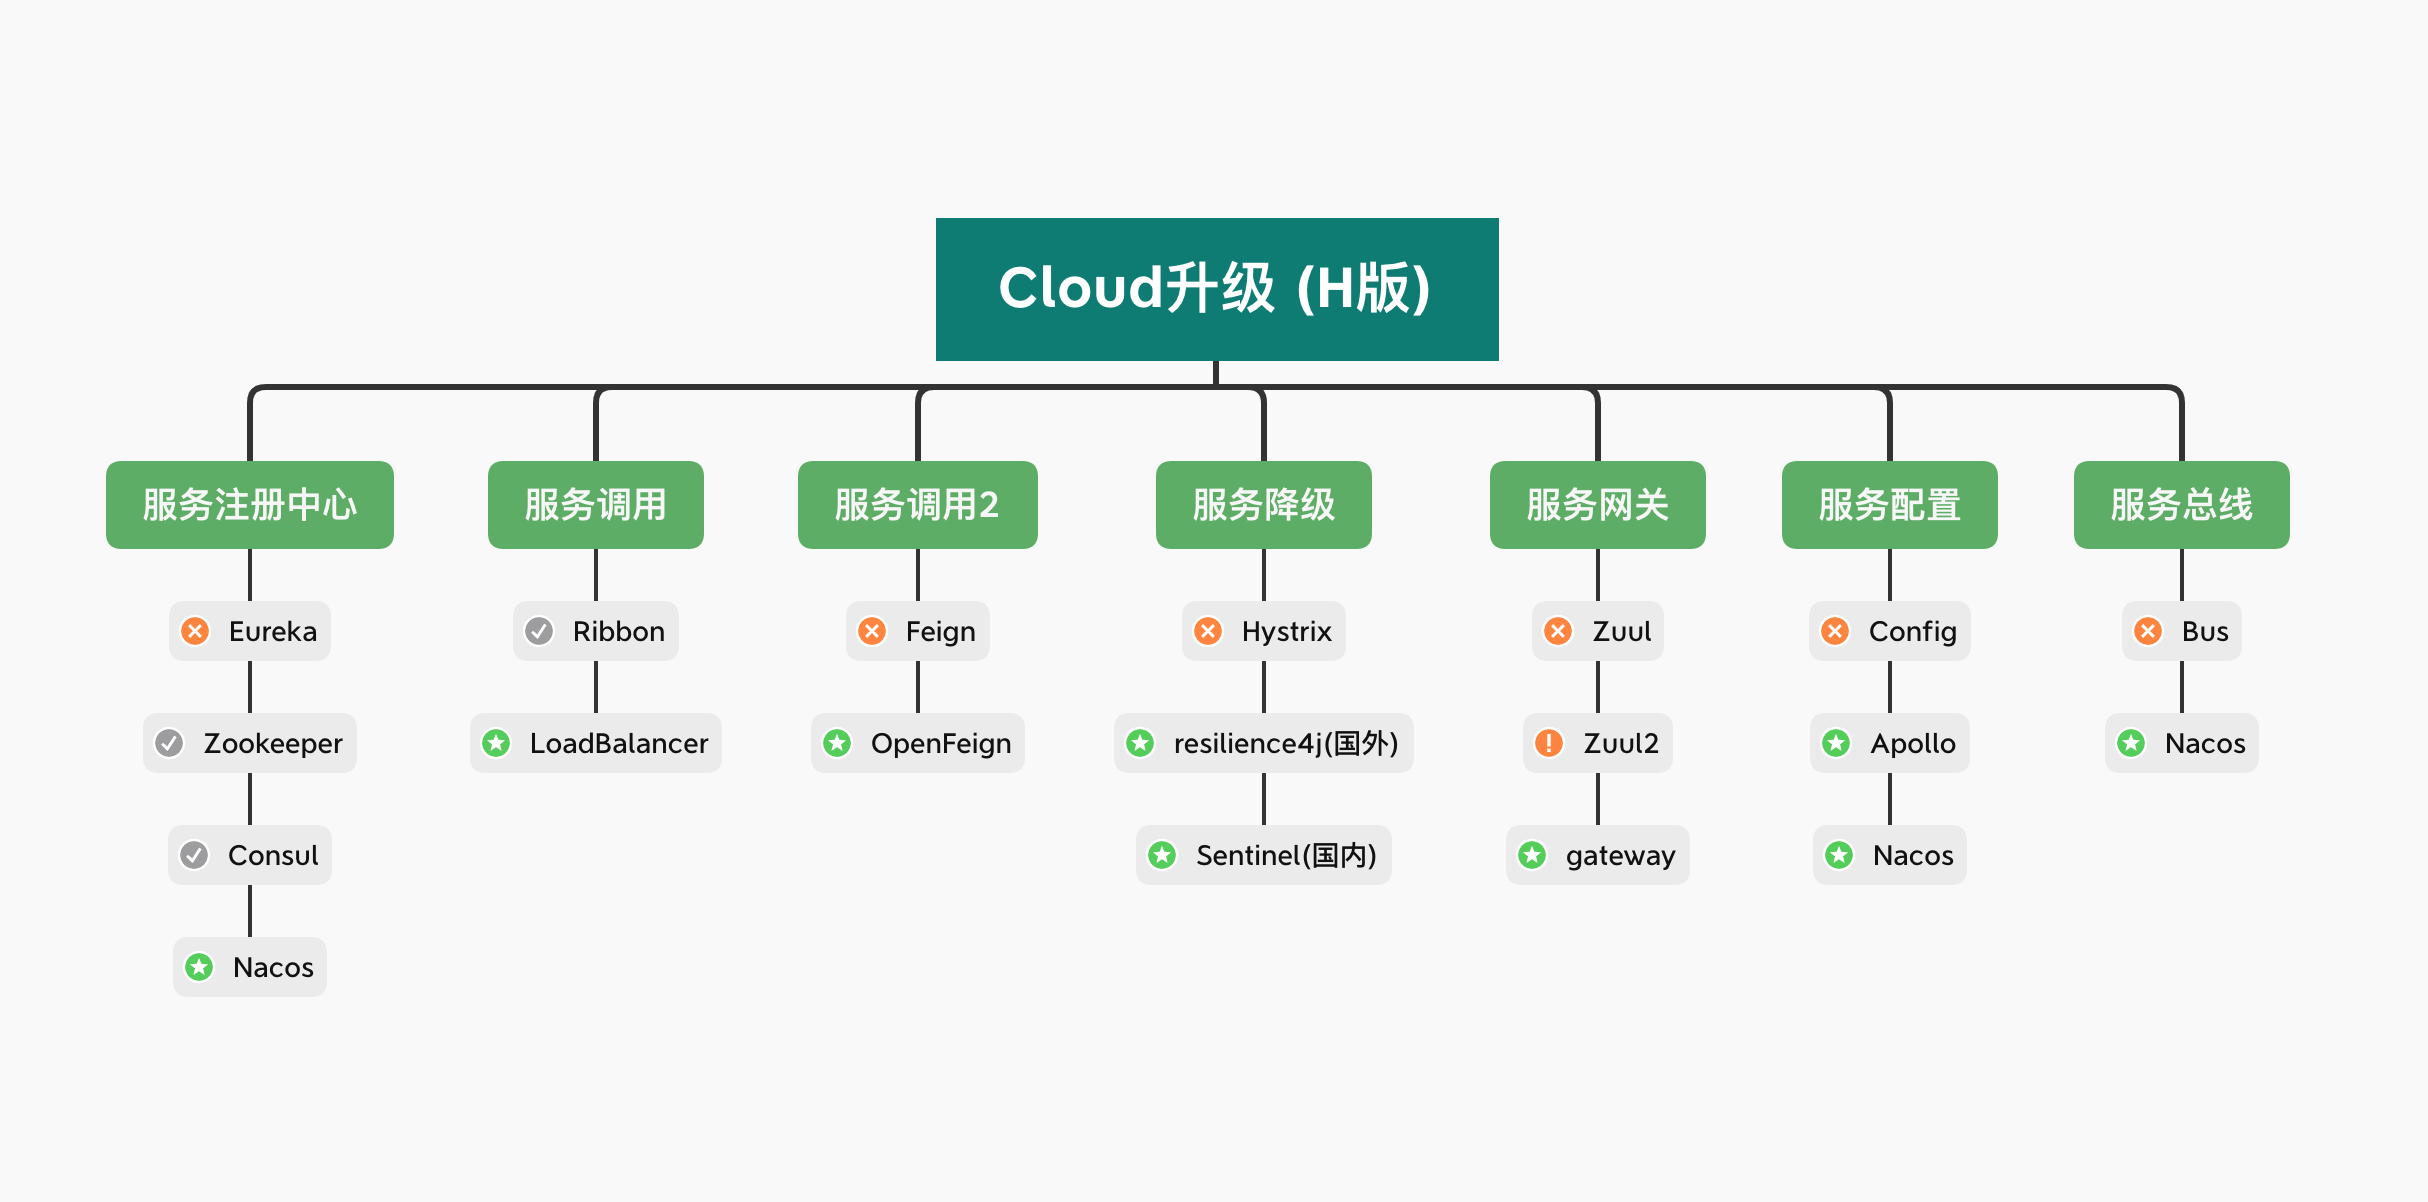
Cloud第二代微服务技术栈
项目的版本选择
https://start.spring.io/actuator/info
https://cloud.spring.io/spring-cloud-static/Hoxton.SR3/reference/html/spring-cloud.html
项目构建原则
约定 > 配置 > 编码
具体步骤:
建模块 –> 改pom –> 写yml –> 主启动 –> 业务类
工程构建
IDEA集成环境设置
1
2
3
4
5
6
7
8
| 1)新建工程
2)聚合总父工程名称
3)maven版本
4)工程名称
5)字符编码设置 Editor->FileEncoding
6)注解生效设置 Build->Annotation Processors->Enable Annotation Processing
7)java编译版本设置 Build->Java Compiler
8)File Type 过滤设置等 Editor->File Types
|
版本约定:
1
2
3
4
5
6
7
8
9
10
11
12
13
14
15
16
17
18
19
20
21
22
23
24
25
26
|
<dependency>
<groupId>org.springframework.boot</groupId>
<artifactId>spring-boot-starter-parent</artifactId>
<version>2.2.5.RELEASE</version>
<type>pom</type>
<scope>import</scope>
</dependency>
<dependency>
<groupId>org.springframework.cloud</groupId>
<artifactId>spring-cloud-dependencies</artifactId>
<version>Hoxton.SR3</version>
<type>pom</type>
<scope>import</scope>
</dependency>
<dependency>
<groupId>com.alibaba.cloud</groupId>
<artifactId>spring-cloud-alibaba-dependencies</artifactId>
<version>2.2.0.RELEASE</version>
<type>pom</type>
<scope>import</scope>
</dependency>
|
基本工程依赖:
1
2
3
4
5
6
7
8
9
10
11
12
13
14
15
16
17
18
19
20
21
22
23
24
25
26
27
28
29
30
31
32
33
34
35
36
37
38
39
40
41
42
43
44
45
46
47
48
49
50
51
52
53
54
55
56
57
58
59
60
61
62
63
64
65
66
67
68
69
70
71
72
73
74
75
76
77
| <?xml version="1.0" encoding="UTF-8"?>
<project xmlns="http://maven.apache.org/POM/4.0.0"
xmlns:xsi="http://www.w3.org/2001/XMLSchema-instance"
xsi:schemaLocation="http://maven.apache.org/POM/4.0.0 http://maven.apache.org/xsd/maven-4.0.0.xsd">
<parent>
<artifactId>zdemo-springcloud-02</artifactId>
<groupId>com.keyllo.demo</groupId>
<version>1.0</version>
</parent>
<modelVersion>4.0.0</modelVersion>
<artifactId>zdemo-springcloud-payment-8001</artifactId>
<dependencies>
<dependency>
<groupId>org.springframework.boot</groupId>
<artifactId>spring-boot-test</artifactId>
<scope>test</scope>
</dependency>
<dependency>
<groupId>org.springframework.boot</groupId>
<artifactId>spring-boot-devtools</artifactId>
<scope>runtime</scope>
<optional>true</optional>
</dependency>
<dependency>
<groupId>org.springframework.boot</groupId>
<artifactId>spring-boot-starter-web</artifactId>
</dependency>
<dependency>
<groupId>org.springframework.boot</groupId>
<artifactId>spring-boot-starter-actuator</artifactId>
</dependency>
<dependency>
<groupId>org.springframework.boot</groupId>
<artifactId>spring-boot-starter-jdbc</artifactId>
</dependency>
<dependency>
<groupId>org.mybatis.spring.boot</groupId>
<artifactId>mybatis-spring-boot-starter</artifactId>
</dependency>
<dependency>
<groupId>com.alibaba</groupId>
<artifactId>druid-spring-boot-starter</artifactId>
</dependency>
<dependency>
<groupId>mysql</groupId>
<artifactId>mysql-connector-java</artifactId>
</dependency>
<dependency>
<groupId>org.projectlombok</groupId>
<artifactId>lombok</artifactId>
</dependency>
</dependencies>
<build>
<resources>
<resource>
<directory>src/main/resources</directory>
<filtering>true</filtering>
<includes>
<include>**/*.yml</include>
<include>**/*.xml</include>
<include>**/*.properties</include>
</includes>
</resource>
</resources>
</build>
</project>
|
基本配置:
1
2
3
4
5
6
7
8
9
10
11
12
13
14
15
16
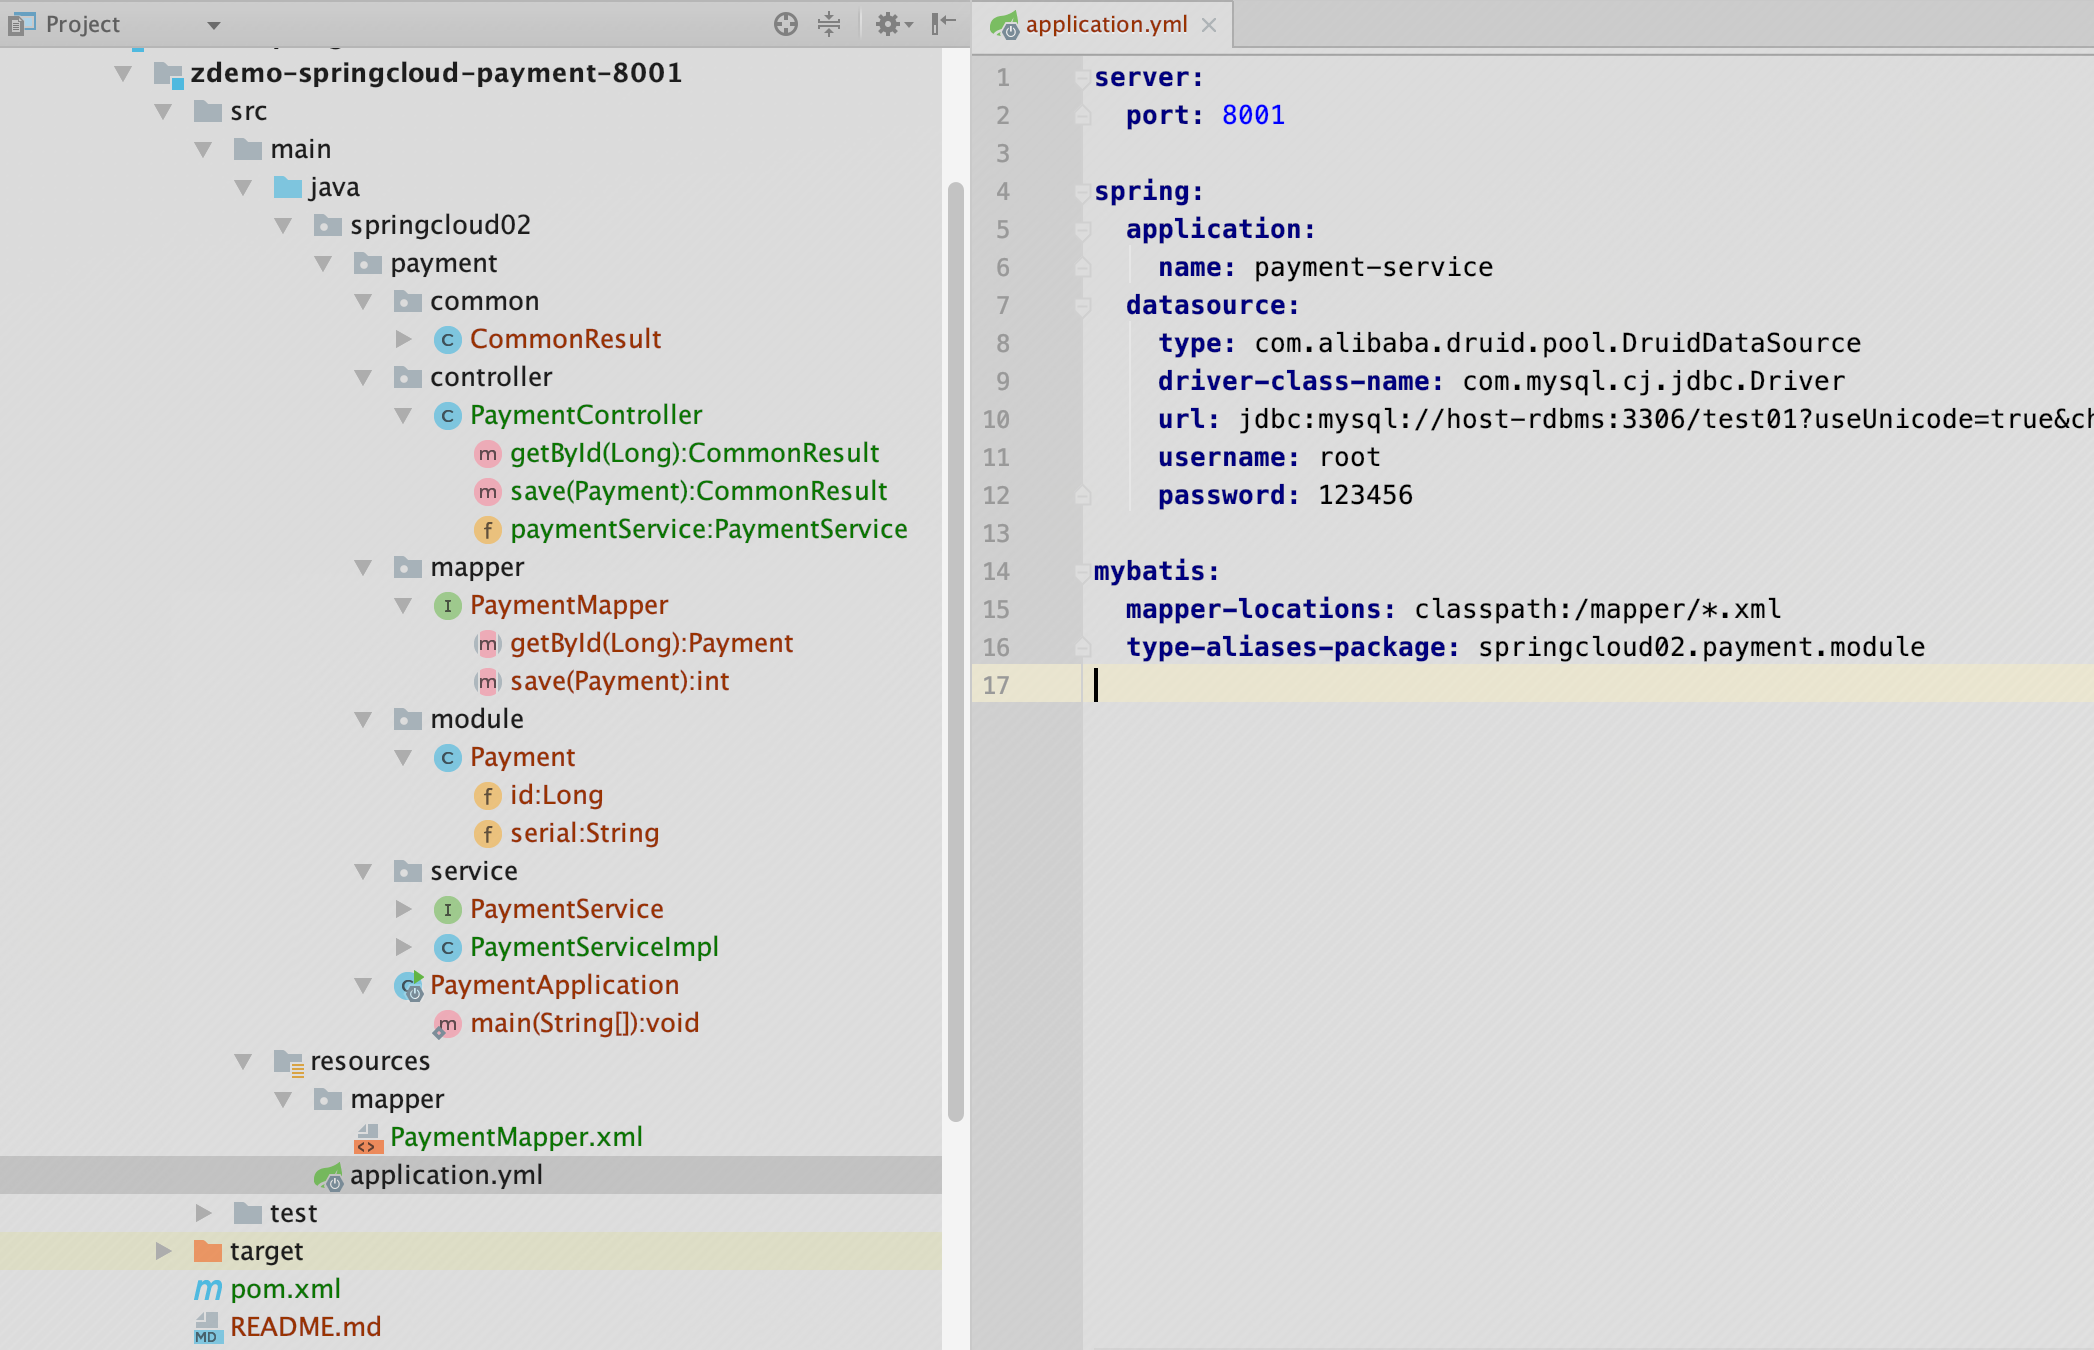
| server:
port: 8001
spring:
application:
name: payment-service
datasource:
type: com.alibaba.druid.pool.DruidDataSource
driver-class-name: com.mysql.cj.jdbc.Driver
url: jdbc:mysql://host-rdbms:3306/test01?useUnicode=true&characterEncoding=UTF-8&serverTimezone=GMT%2B8
username: root
password: 123456
mybatis:
mapper-locations: classpath:/mapper/*.xml
type-aliases-package: springcloud02.payment.module
|
开发时热部署的设置
第一步:在父工程引入jar包和插件
1
2
3
4
5
6
7
8
9
10
11
12
13
14
15
16
17
|
<dependency>
<groupId>org.springframework.boot</groupId>
<artifactId>spring-boot-devtools</artifactId>
<scope>runtime</scope>
<optional>true</optional>
</dependency>
<plugin>
<groupId>org.springframework.boot</groupId>
<artifactId>spring-boot-maven-plugin</artifactId>
<configuration>
<fork>true</fork>
<addResources>true</addResources>
</configuration>
</plugin>
|
第二步:开启idea自动编译选项
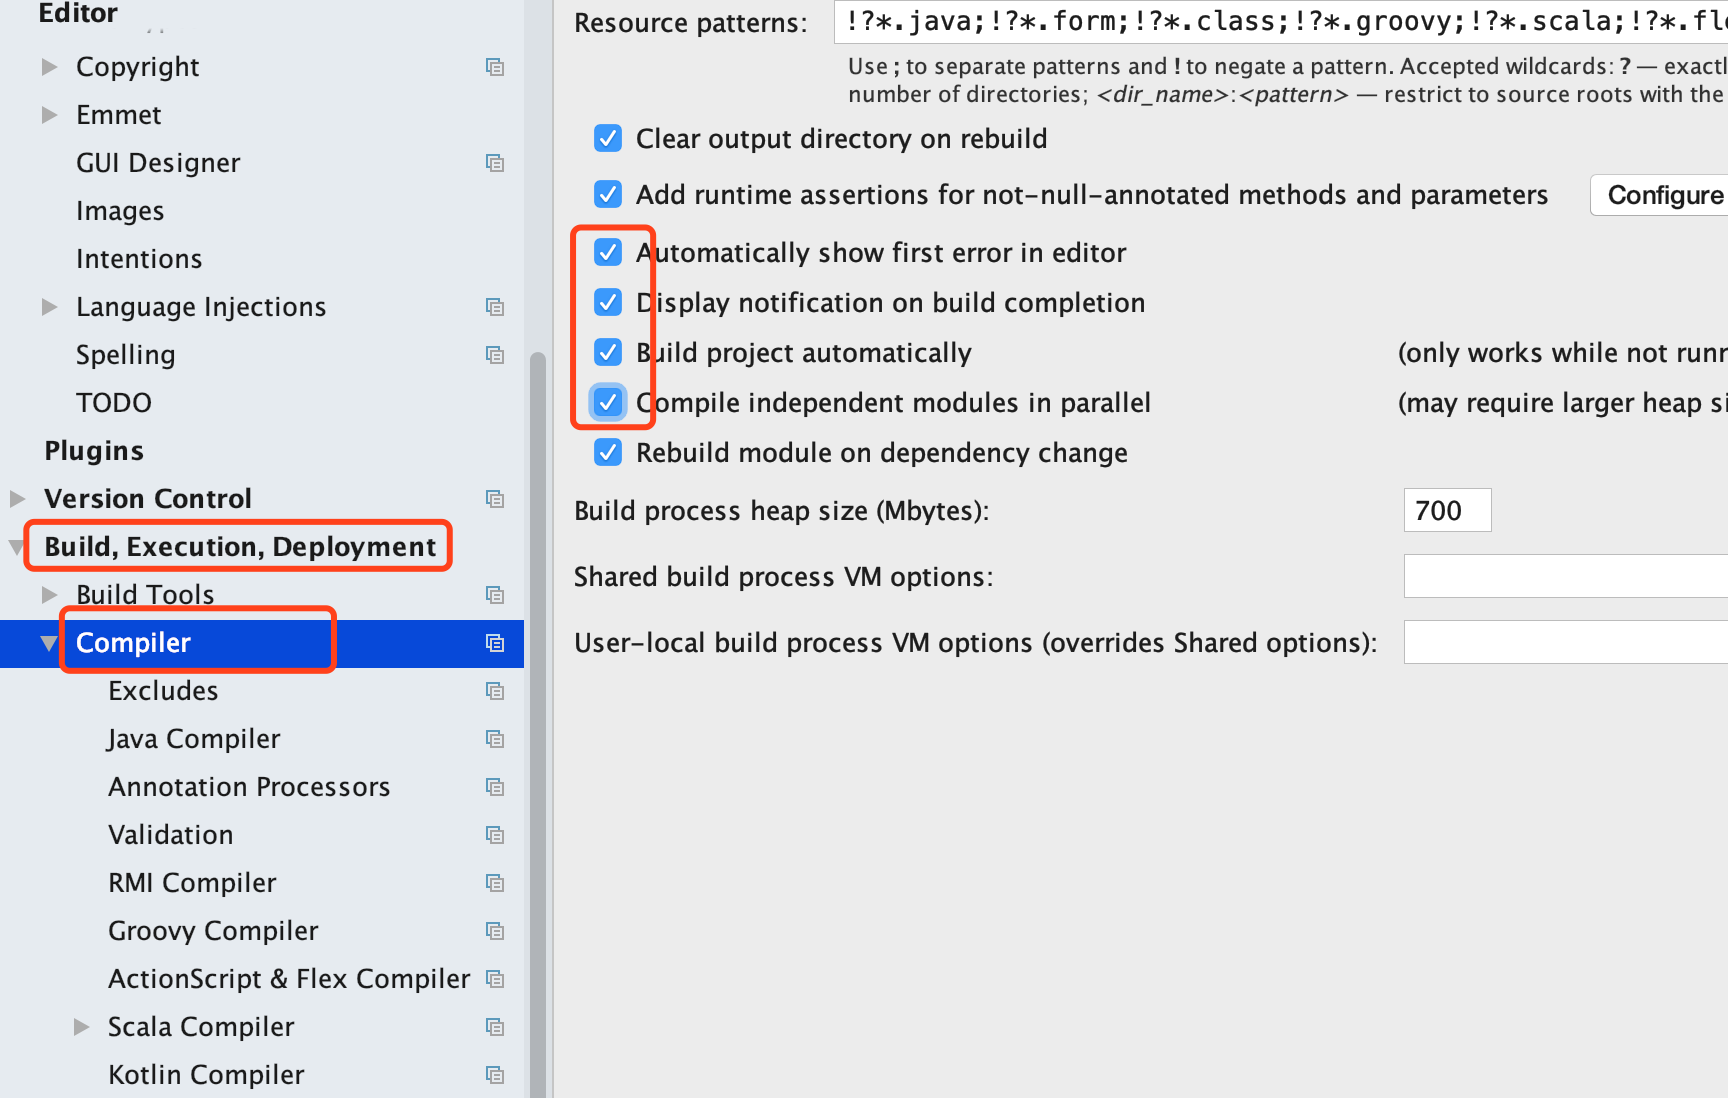
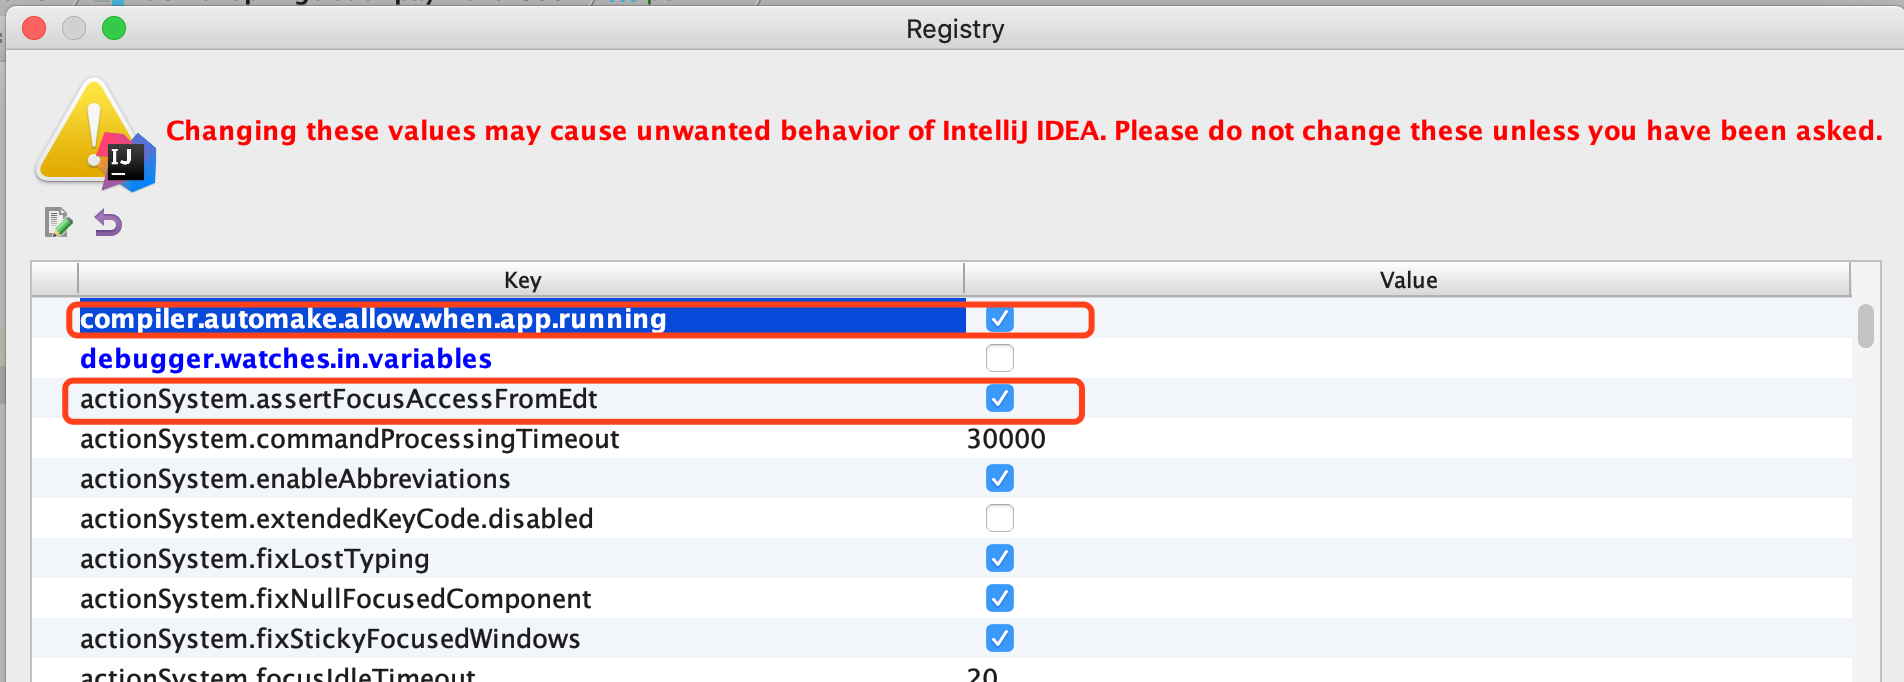
第三步:打开Maintenance对话框,勾选下面两个选项
第四步:重启idea,OK,大功告成!
注意:热部署设置只能在项目开发阶段使用!
使用 Run Dashboard 调试微服务
如果你的idea中没有自动出现Run Dashboard的界面,莫慌,粘贴如下代码到你的项目 .idea/workspace.xml ,重启idea,大功告成!
1
2
3
4
5
6
7
8
9
10
11
12
13
14
15
16
17
18
| <component name="RunDashboard">
<option name="configurationTypes">
<set>
<option value="SpringBootApplicationConfigurationType" />
</set>
</option>
<option name="ruleStates">
<list>
<RuleState>
<option name="name" value="ConfigurationTypeDashboardGroupingRule" />
</RuleState>
<RuleState>
<option name="name" value="StatusDashboardGroupingRule" />
</RuleState>
</list>
</option>
<option name="contentProportion" value="0.17384952" />
</component>
|